Upsells and Dependencies
Upsells and dependencies allow you to add messaging to the eCommerce cart regarding other events that you have available.
TABLE OF CONTENTS |
Upsells
Upsells appear at the bottom of the cart, below the donations widget. The banner language can be controlled by the Cart Upsells eCommerce text variables. Upsells can be used to promote special events when a more common event is selected.

Dependencies
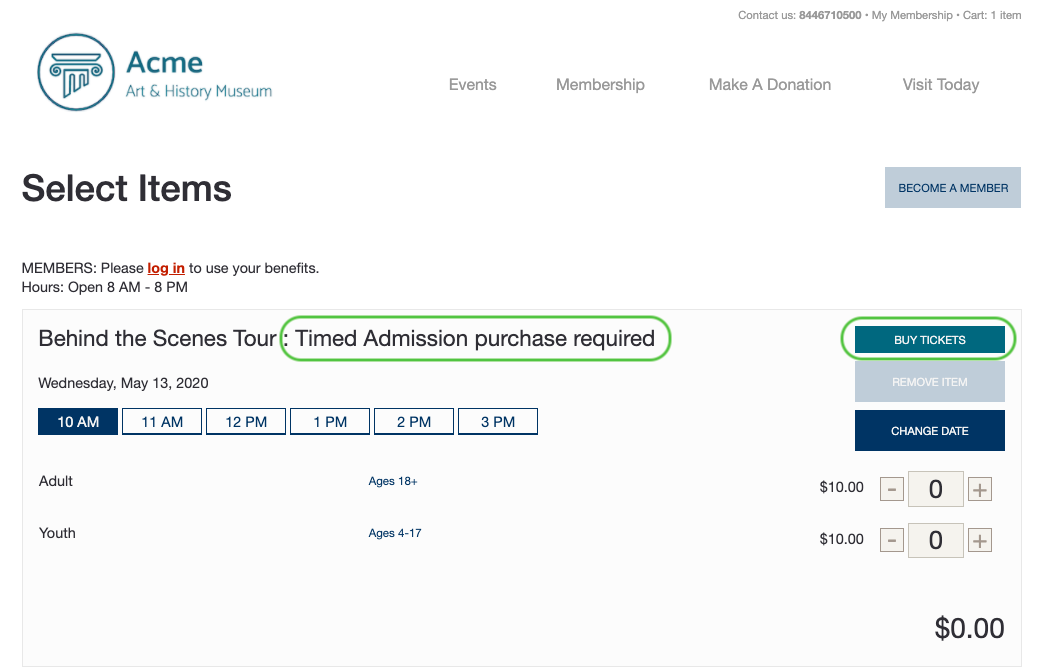
Dependencies offer a strong warning to guests if they have a ticket in the cart and tickets to an additional event are required. This message warns that another event is required, and offers a link to add that to the guest's cart, but it does not prevent the guest from checkout out without those additional tickets. This is to make sure a sale is not blocked, such as if a guest has purchased Admission tickets separately and are now looking to buy tickets to an additional event during their visit.

Upsells Configuration
To configure upsells log into Backoffice and navigate to Events > Templates, find the event you wish to add upsells to, and double click on the Event Name (instead of clicking edit). For example, if a guest adds your Admission event (event A) to the cart, you want your Tour event (event B) to show as an upsell.
- Double click on the name of Event A, and you will open up the Event Template and see Upsells and Dependencies in the top right corner.
- To add an Upsell, select Upsells in the top right corner.

- This will open up a new screen, allowing you to select an upsell event template. Select the large + sign to proceed.
- This will open a drop-down menu, allowing you to search and select the template you wish to add as an Upsell.
- Setting the parameters for your Upsell event is optional, and allows you to define a minimum gap (Allow) and maximum gap (must begin with) between the start times.
- Note: If an upsell event is added to the cart, it will default to the same day as the original event. Unless both events have hard start times in separate locations, the allow/must begin with settings are not necessary.

- Once you have added the Upsell event(s), click Edit Template and then Publish.
Now, your upsell event(s) will appear in the cart when the "anchor" even is placed in the cart.
Upsell Theme Variables
Text Variables
These Theme variables control the copy in the banner displayed above all Upsell events. If you have upsells configured for multiple "anchor" events, keep in mind that the copy should be applicable across these options.
"orders-tickets-page-upsells-heading": "Upgrade your visit with these experiences",
"orders-tickets-page-upsells-caption": "Guests who purchased your selected event also purchased:",
CSS Variables
These Theme variables control the color and display parameters that will be used for the banner background and text copy that's been configured. These will be used anywhere on the ACME pages a banner is displayed, including upsells and membership banners on the events list and membership profile pages.
"@banner-background-color": "#000000",
"@banner-text-color": "#ffffff",
"@banner-heading-font-size": "30px",
"@banner-heading-text-transform": "none",
"@banner-caption-font-size": "16px",
Dependencies Configuration
To configure dependencies log into Backoffice and navigate to Events > Templates, find the event you wish to add upsells to, and double click on the Event Name (instead of clicking edit). For example, if a guest must have an Admission ticket (event A) if they are taking a Tour (event B), you will configure the Tour to be dependent on Admission, and the warning would show if the Tour is in their cart and Admission is not.
- Double click on the name of event A, and you will open up the Event Template and see Upsells and Dependencies in the top right corner.
- To add a Dependency, select Dependents in the top right corner.
- This will open up a new screen, allowing you to select a dependent event template (event B). Select the large + sign to proceed.
- This will open a drop-down menu, allowing you to search and select the template you wish to add.
- Setting the parameters for your Dependent event is optional, and allows you to define a minimum gap (Allow) and maximum gap (must begin with) between the start times.
- Note: If the Dependent event is added to the cart, it will default to the same day as the original event. Unless both events have hard start times in separate locations, the allow/must begin with settings are not necessary.
- Once you have added the Dependent event(s), click Edit Template and then Publish.
- Now, go to the Dependent event, event B, that you just linked to event A. Open the template and click publish, so it can pick up the relationship you just set to Event A.
Now, when event B is added to the cart, a warning will appear unless event A is already in the cart.


