Overview
While it is possible to use a pixel in various ways, most likely you will want to use it to track completed purchases. This article focuses on configuring this use case.
Prerequisite
If you have not already, complete your Google Tag Manager (GTM) Tenant Setup.
Configure a Pixel Tag to trigger on Order Confirmation
Log into Google Tag Manager
Navigate to the Container you want to add the tag to (e.g. ACME Production)
Click Tags in the left nav
Click New
Provide a title (e.g. Facebook Pixel)
Click on Tag Configuration to open the list of options
Select Custom HTML
Insert the pixel code in the HTML section
Go to Advanced Settings and make sure the Tag firing options is set to 'Once per event'
Tap on Triggering to open the list of options
Select the checkout trigger you configured to fire on “Purchase::Complete” (see Google Tag Manager (GTM) Tenant Setup if you have not created this yet)
Save

How to Test
In Google Tag Manager, tap "Preview"
In another browser tab, go to your ACME environment
You can test this out in your sandbox environment (e.g. https://sand10-buy.acmeticketing.net/events/<Tenant ID>/list) provided you have the "gtm-tracking-code-test" value defined in your Theme in ACME backoffice.
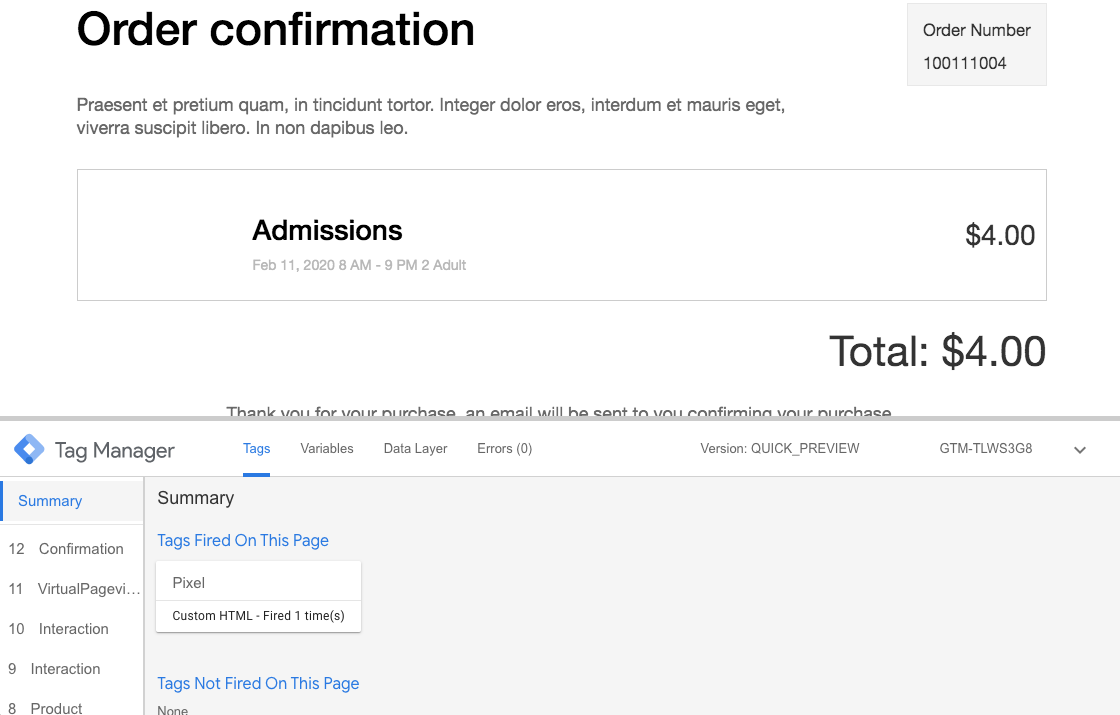
You should see the Google Tag Manager debugger at the bottom of your screen.
If you do not see this, make sure you don't have any ad blockers like uBlock running. Perform a hard refresh and you should see the debug panel.
Complete a checkout.
Once on the confirmation page, you should see that the new tag configured is successfully fired